Application Setup
Let's start by creating a new project, installing required dependencies, and setting up a basic server application.
Create project
- Node.js & VSCode
- .NET 6 & VSCode
- .NET 6 & VS2022
Create a new folder for your project, navigate to it in the command line, and initialize a new Node.js project:
npm init -y
Next, install all the Node.js dependencies we're going to use. In this case it will be dotenv (utility for initializing environment variables from a file), Express.js (web framework), and cookie-session for handling cookie-based sessions, and finally the required APS SDK modules:
As of April 2024 the APS SDK for Node.js is in beta, which means that the public interfaces can still change. To avoid any potential issues, we recommend installing the specific versions of these packages as shown below.
npm install --save dotenv express cookie-session
npm install --save @aps_sdk/autodesk-sdkmanager@0.0.7-beta.1
npm install --save @aps_sdk/authentication@0.1.0-beta.1
npm install --save @aps_sdk/data-management@0.1.0-beta.1
The "dependencies" in your package.json file should now look something like this
(potentially with slightly different version numbers):
// ...
  "dependencies": {
    "@aps_sdk/authentication": "0.1.0-beta.1",
    "@aps_sdk/autodesk-sdkmanager": "0.0.7-beta.1",
    "@aps_sdk/data-management": "0.1.0-beta.1",
    "cookie-session": "^1.4.0",
    "dotenv": "^16.3.1",
    "express": "^4.18.2"
  },
// ...
Finally, let's create a couple more subfolders in your project folder that we're going to need later:
wwwroot- this is where we're going to put all the client side assets (HTML, CSS, JavaScript, images, etc.)routes- this is where we're going to implement all the server endpointsservices- here we're going to keep all the server-side logic that can be shared by different endpoints
Create a new folder for your project, navigate to it in the command line, and initialize a new ASP.NET Core project:
dotnet new web
Next we will need to install the dependencies. In this case it will be the required APS SDK packages:
dotnet add package Autodesk.SdkManager
dotnet add package Autodesk.Authentication
dotnet add package Autodesk.DataManagement
The *.csproj file in your project should now look similar to this (possibly with
slightly different version numbers, and additional .NET settings):
<Project Sdk="Microsoft.NET.Sdk.Web">
  <PropertyGroup>
    <TargetFramework>net6.0</TargetFramework>
  </PropertyGroup>
  <ItemGroup>
  </ItemGroup>
  <ItemGroup>
    <PackageReference Include="Autodesk.Authentication" Version="1.0.0" />
    <PackageReference Include="Autodesk.DataManagement" Version="1.0.0" />
    <PackageReference Include="Autodesk.SdkManager" Version="1.0.0" />
  </ItemGroup>
</Project>
Finally, let's create a couple more subfolders in your project folder that we're going to need later:
Controllers- this is where we're going to implement all the server endpointsModels- here we're going to keep all the server-side logic that can be shared by different endpointswwwroot- this is where we're going to put all the client side assets (HTML, CSS, JavaScript, images, etc.)
If the .vscode folder is not created automatically, you can create it via the Run & Debug sidepanel
To create the .vscode folder click on the Run and Debug tool on the left sidepanel > create a launch.json file > Select .NET5+ & .NET Core.
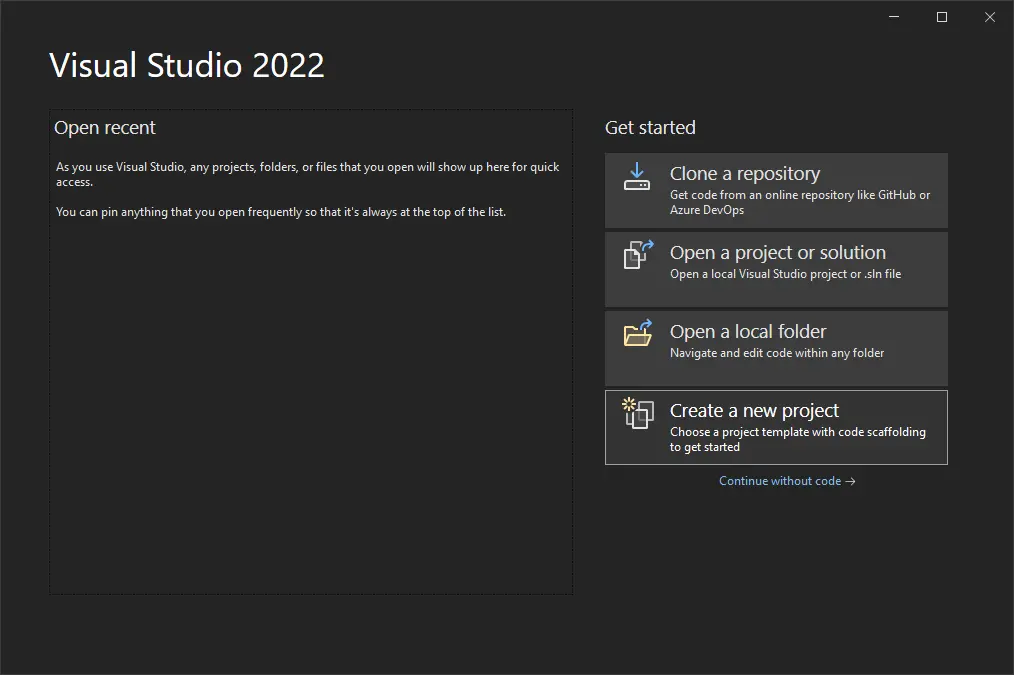
Create a new project in Visual Studio:
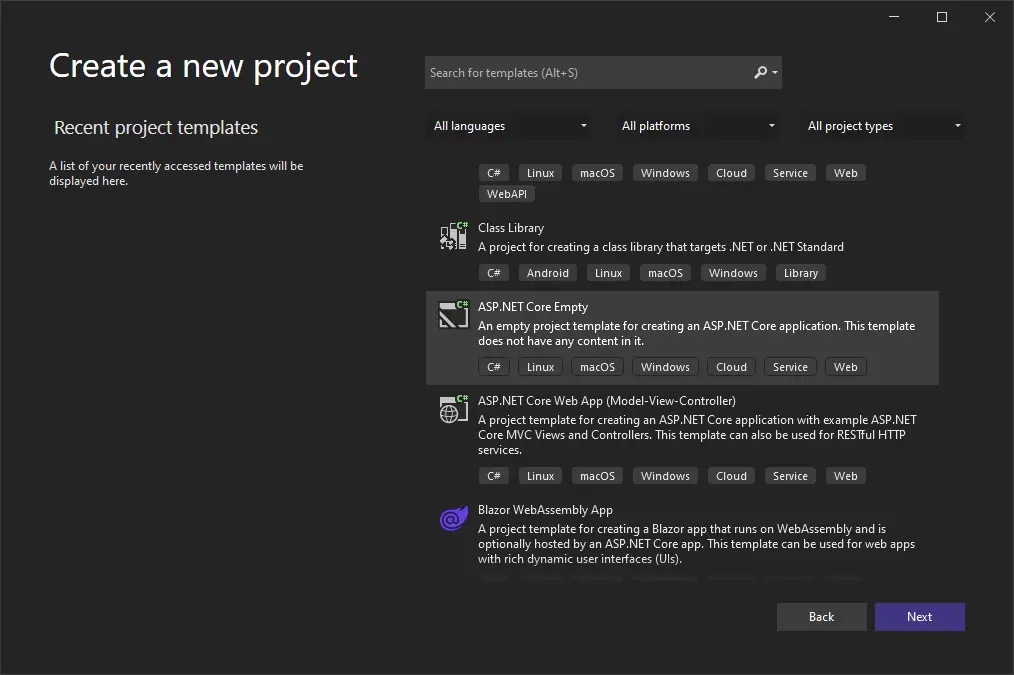
Choose the ASP.NET Core Empty template:
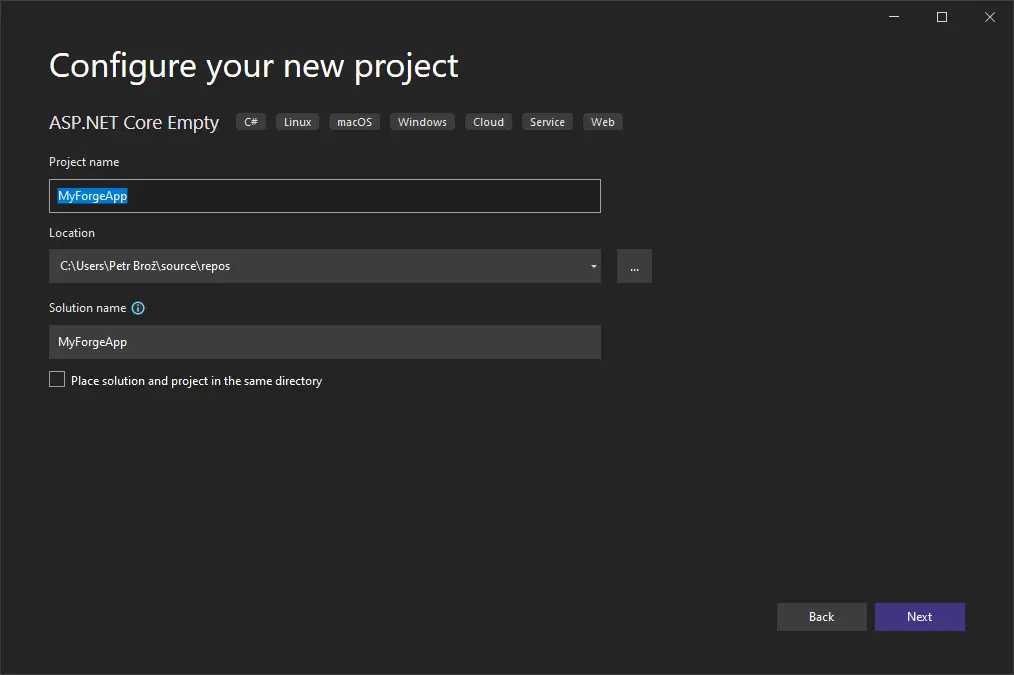
Name the project any way you want:
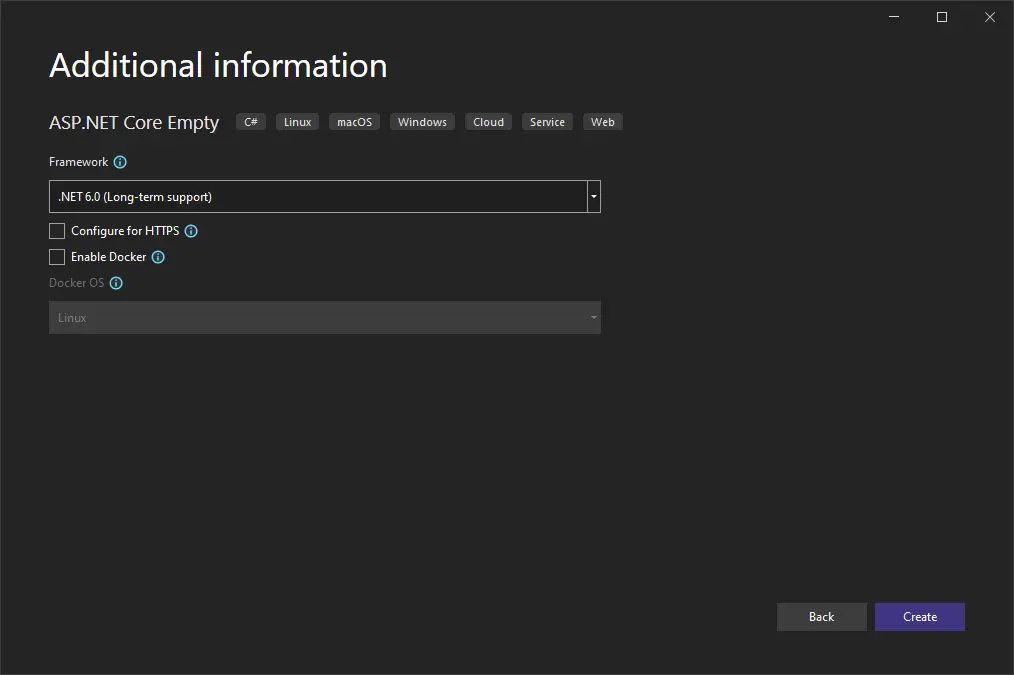
Choose the .NET 6.0 (Long-term support) framework, and disable HTTPS as we don't need it for now:
Once the project is ready, create the following subfolders in your project folder:
Controllers- this is where we're going to implement all the server endpointsModels- here we're going to keep all the server-side logic that can be shared by different endpointswwwroot- this is where we're going to put all the client side assets (HTML, CSS, JavaScript, images, etc.)
Next we will need to install the dependencies. In this case it will be a couple of modules of the official APS SDK. In the Solution Explorer, right-click on Dependencies, and then click on Manage NuGet Packages...:
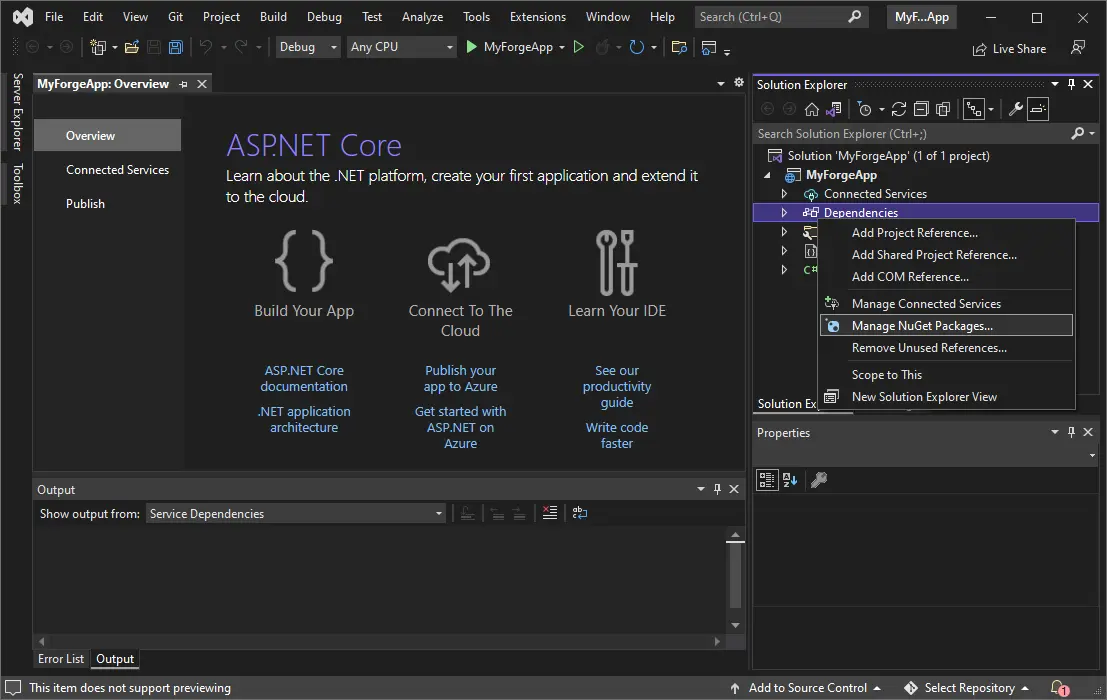
In the NuGet Package Manager, switch to the Browse tab, and search for and install the following packages:
Application config
Our application will need a couple of configuration parameters to run properly, for example, the credentials of our APS app for communicating with Autodesk Platform Services, or the callback URL where our users will be redirected to during the 3-legged authentication workflow. We will pass these parameters to the server app using environment variables.
- Node.js & VSCode
- .NET 6 & VSCode
- .NET 6 & VS2022
Create a config.js file in the root of your project folder, and add the following code:
require('dotenv').config();

let { APS_CLIENT_ID, APS_CLIENT_SECRET, APS_CALLBACK_URL, SERVER_SESSION_SECRET, PORT } = process.env;
if (!APS_CLIENT_ID || !APS_CLIENT_SECRET || !APS_CALLBACK_URL || !SERVER_SESSION_SECRET) {
    console.warn('Missing some of the environment variables.');
    process.exit(1);
}
PORT = PORT || 8080;

module.exports = {
    APS_CLIENT_ID,
    APS_CLIENT_SECRET,
    APS_CALLBACK_URL,
    SERVER_SESSION_SECRET,
    PORT
};
The dotenv library initializes environment variables from a local .env file (if there's one).
We then simply read the environment variables from process.env, and exit the application
immediately if any of the required properties are missing.
Next, let's create the .env file in the project folder, and populate it with the required
environment variables (replacing <client-id> and <client-secret> with your APS Client ID
and Client Secret, and <secret-phrase> with an arbitrary string):
APS_CLIENT_ID="<client-id>"
APS_CLIENT_SECRET="<client-secret>"
APS_CALLBACK_URL="http://localhost:8080/api/auth/callback" # URL your users will be redirected to after logging in with their Autodesk account
SERVER_SESSION_SECRET="<secret-phrase>" # secret phrase used to encrypt/decrypt server session cookies
Since the .env file contains sensitive information, make sure that it is not included in git!
This can be ensured by adding the .env line to the .gitignore file.
Now, in order to be able to run and debug our application from Visual Studio Code, we need to create a launch configuration. Use Run > Add Configuration in the menu to create a new configuration, and when prompted for the specific environment, choose Node.js. This will create a new .vscode subfolder in your project with a launch.json file where you can define different launch configurations. Replace the content of the file with the following:
{
    "version": "0.2.0",
    "configurations": [
        {
            "type": "node",
            "request": "launch",
            "name": "Launch Server",
            "runtimeExecutable": "npm",
            "runtimeArgs": [
                "start"
            ],
            "skipFiles": [
                "<node_internals>/**/*.js"
            ]
        }
    ]
}
We are defining a single launch configuration called Launch Server that will simply
start our application using the npm start command.
Create a Startup.cs file in the root folder of your project with the following content:
using System;
using Microsoft.AspNetCore.Builder;
using Microsoft.AspNetCore.Hosting;
using Microsoft.Extensions.Configuration;
using Microsoft.Extensions.DependencyInjection;
using Microsoft.Extensions.Hosting;

public class Startup
{
    public Startup(IConfiguration configuration)
    {
        Configuration = configuration;
    }

    public IConfiguration Configuration { get; }

    // This method gets called by the runtime. Use this method to add services to the container.
    public void ConfigureServices(IServiceCollection services)
    {
        services.AddControllers();
        var clientID = Configuration["APS_CLIENT_ID"];
        var clientSecret = Configuration["APS_CLIENT_SECRET"];
        var callbackURL = Configuration["APS_CALLBACK_URL"];
        if (string.IsNullOrEmpty(clientID) || string.IsNullOrEmpty(clientSecret) || string.IsNullOrEmpty(callbackURL))
        {
            throw new ApplicationException("Missing required environment variables APS_CLIENT_ID, APS_CLIENT_SECRET, or APS_CALLBACK_URL.");
        }
    }

    // This method gets called by the runtime. Use this method to configure the HTTP request pipeline.
    public void Configure(IApplicationBuilder app, IWebHostEnvironment env)
    {
        if (env.IsDevelopment())
        {
            app.UseDeveloperExceptionPage();
        }
        app.UseDefaultFiles();
        app.UseStaticFiles();
        app.UseRouting();
        app.UseEndpoints(endpoints =>
        {
            endpoints.MapControllers();
        });
    }
}
The Startup class is responsible for configuring our server and its "middleware" (for example,
serving of static files), and for retrieving the configuration intpus from environment variables
(or from other configuration providers)
for later use.
Now, to pass actual configuration values to our application for debugging purposes,
we will modify the appsettings.Development.json file in our project folder
(or create one of it does not exist) with the following content, replacing
<client-id> and <client-secret> with your APS Client ID and Client Secret:
{
  "Logging": {
    "LogLevel": {
      "Default": "Information",
      "Microsoft.AspNetCore": "Warning"
    }
  },
  "APS_CLIENT_ID": "<client-id>",
  "APS_CLIENT_SECRET": "<client-secret>",
  "APS_CALLBACK_URL": "http://localhost:8080/api/auth/callback"
}
Since the appsettings.Development.json file contains sensitive information, make sure that it is not included in git!
This can be ensured by adding the appsettings.Development.json line to the .gitignore file.
Create basic server
Next we'll setup a basic server application.
- Node.js & VSCode
- .NET 6 & VSCode
- .NET 6 & VS2022
Create a server.js file in the root of your project folder with the following code:
const express = require('express');
const session = require('cookie-session');
const { PORT, SERVER_SESSION_SECRET } = require('./config.js');

let app = express();
app.use(express.static('wwwroot'));
app.use(session({ secret: SERVER_SESSION_SECRET, maxAge: 24 * 60 * 60 * 1000 }));
app.listen(PORT, () => console.log(`Server listening on port ${PORT}...`));
For now the server isn't doing much, just serving client side assets from the wwwroot subfolder,
and accessing session data stored in cookies. The cookies will be encrypted using a secret phrase
that we will need to pass to the application via the environment variable SERVER_SESSION_SECRET.
Next, let's add a "start": "node server.js" script to the package.json file so that we can
easily run our application later:
// ...
"scripts": {
    "start": "node server.js"
}
// ...
Replace the content of Program.cs with the following:
using Microsoft.AspNetCore.Hosting;
using Microsoft.Extensions.Hosting;

public class Program
{
    public static void Main(string[] args)
    {
        CreateHostBuilder(args).Build().Run();
    }

    public static IHostBuilder CreateHostBuilder(string[] args) =>
        Host.CreateDefaultBuilder(args)
            .ConfigureWebHostDefaults(webBuilder =>
            {
                webBuilder.UseStartup<Startup>();
            });
}
This code will make sure that the .NET application creates a web server with our
new Startup class.
And finally, let's update the launchSettings.json file under the Properties folder to make
sure that our server app is using the default protocol (HTTP) and port (8080) that we
will use throughout this tutorial. Update the applicationUrl property of the default
launch profile to http://localhost:8080:
{
  "iisSettings": {
    "windowsAuthentication": false,
    "anonymousAuthentication": true,
    "iisExpress": {
      "applicationUrl": "http://localhost:38524",
      "sslPort": 44323
    }
  },
  "profiles": {
    "my_aps_app": {
      "commandName": "Project",
      "dotnetRunMessages": true,
      "launchBrowser": true,
      "applicationUrl": "http://localhost:8080",
      "environmentVariables": {
        "ASPNETCORE_ENVIRONMENT": "Development"
      }
    },
    "IIS Express": {
      "commandName": "IISExpress",
      "launchBrowser": true,
      "environmentVariables": {
        "ASPNETCORE_ENVIRONMENT": "Development"
      }
    }
  }
}
Replace the content of Program.cs with the following:
using Microsoft.AspNetCore.Hosting;
using Microsoft.Extensions.Hosting;

public class Program
{
    public static void Main(string[] args)
    {
        CreateHostBuilder(args).Build().Run();
    }

    public static IHostBuilder CreateHostBuilder(string[] args) =>
        Host.CreateDefaultBuilder(args)
            .ConfigureWebHostDefaults(webBuilder =>
            {
                webBuilder.UseStartup<Startup>();
            });
}
This code will make sure that the .NET application creates a web server with our
new Startup class.
And finally, let's update the launchSettings.json file under the Properties folder to make
sure that our server app is using the default protocol (HTTP) and port (8080) that we
will use throughout this tutorial. Update the applicationUrl property of the default
launch profile to http://localhost:8080:
{
  "iisSettings": {
    "windowsAuthentication": false,
    "anonymousAuthentication": true,
    "iisExpress": {
      "applicationUrl": "http://localhost:38524",
      "sslPort": 44323
    }
  },
  "profiles": {
    "MyApsApp": {
      "commandName": "Project",
      "dotnetRunMessages": true,
      "launchBrowser": true,
      "applicationUrl": "http://localhost:8080",
      "environmentVariables": {
        "ASPNETCORE_ENVIRONMENT": "Development"
      }
    },
    "IIS Express": {
      "commandName": "IISExpress",
      "launchBrowser": true,
      "environmentVariables": {
        "ASPNETCORE_ENVIRONMENT": "Development"
      }
    }
  }
}
Try it out
- Node.js & VSCode
- .NET 6 & VSCode
- .NET 6 & VS2022
Start the application from Visual Studio Code (for example, via the Run > Start Debugging
menu, or by pressing F5), and navigate to http://localhost:8080
in the browser. The server should respond with Cannot GET / because we haven't added any
logic to it just yet. That's going to be the topic of the next step.
Start the application from Visual Studio Code (for example, via the Run > Start Debugging
menu, or by pressing F5), and navigate to http://localhost:8080
in the browser. The server should respond with a 404 error because we haven't added any
logic to it just yet. That's going to be the topic of the next step.
Start the application from Visual Studio (for example, via the Debug > Start Debugging
menu, or by pressing F5), and it will automatically open http://localhost:8080
in your browser. You should get a 404 response because we haven't implemented any server logic yet.
That's going to be the goal of the next step.